Air001 Arduino-based user manual#
Note
Air001 The Arduino information station is open! Will update the full hands-on tutorial with various examples, welcome favorites.
Developing with the Arduino IDE#
Preparations#
Install Arduino IDE, it is recommended to install Arduino IDE 2.x
Add Development Board Address#
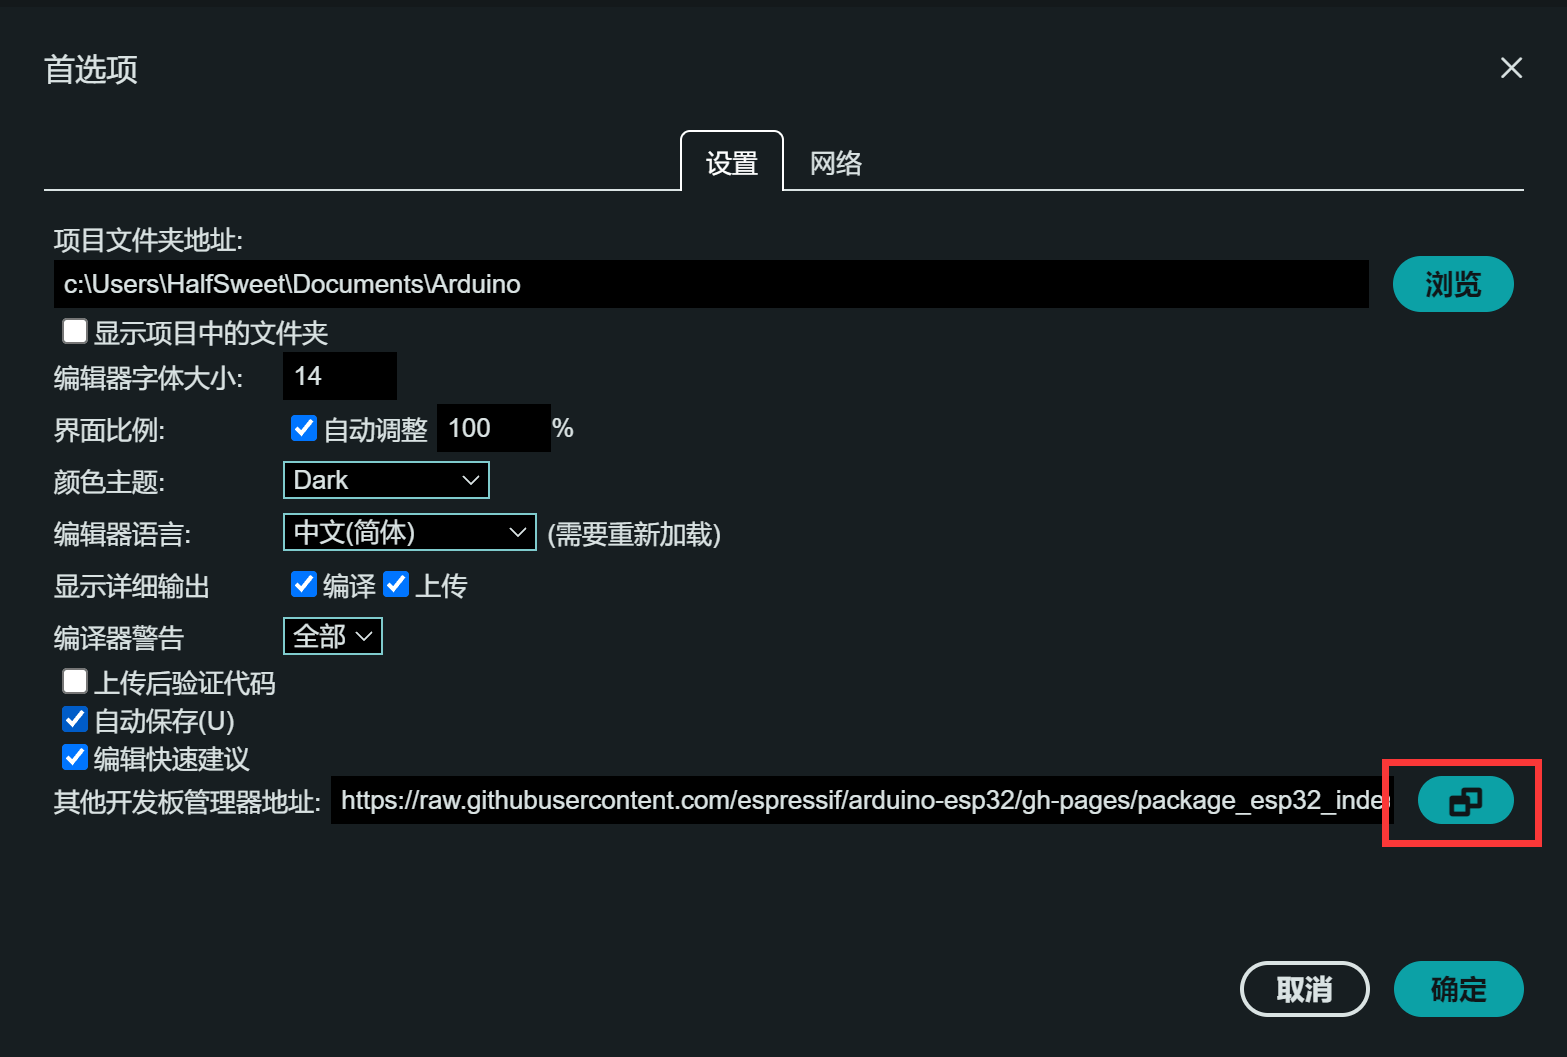
Click Arduino File-Preferences in the top left corner of the IDE
 Enter the address of your AirMCU in
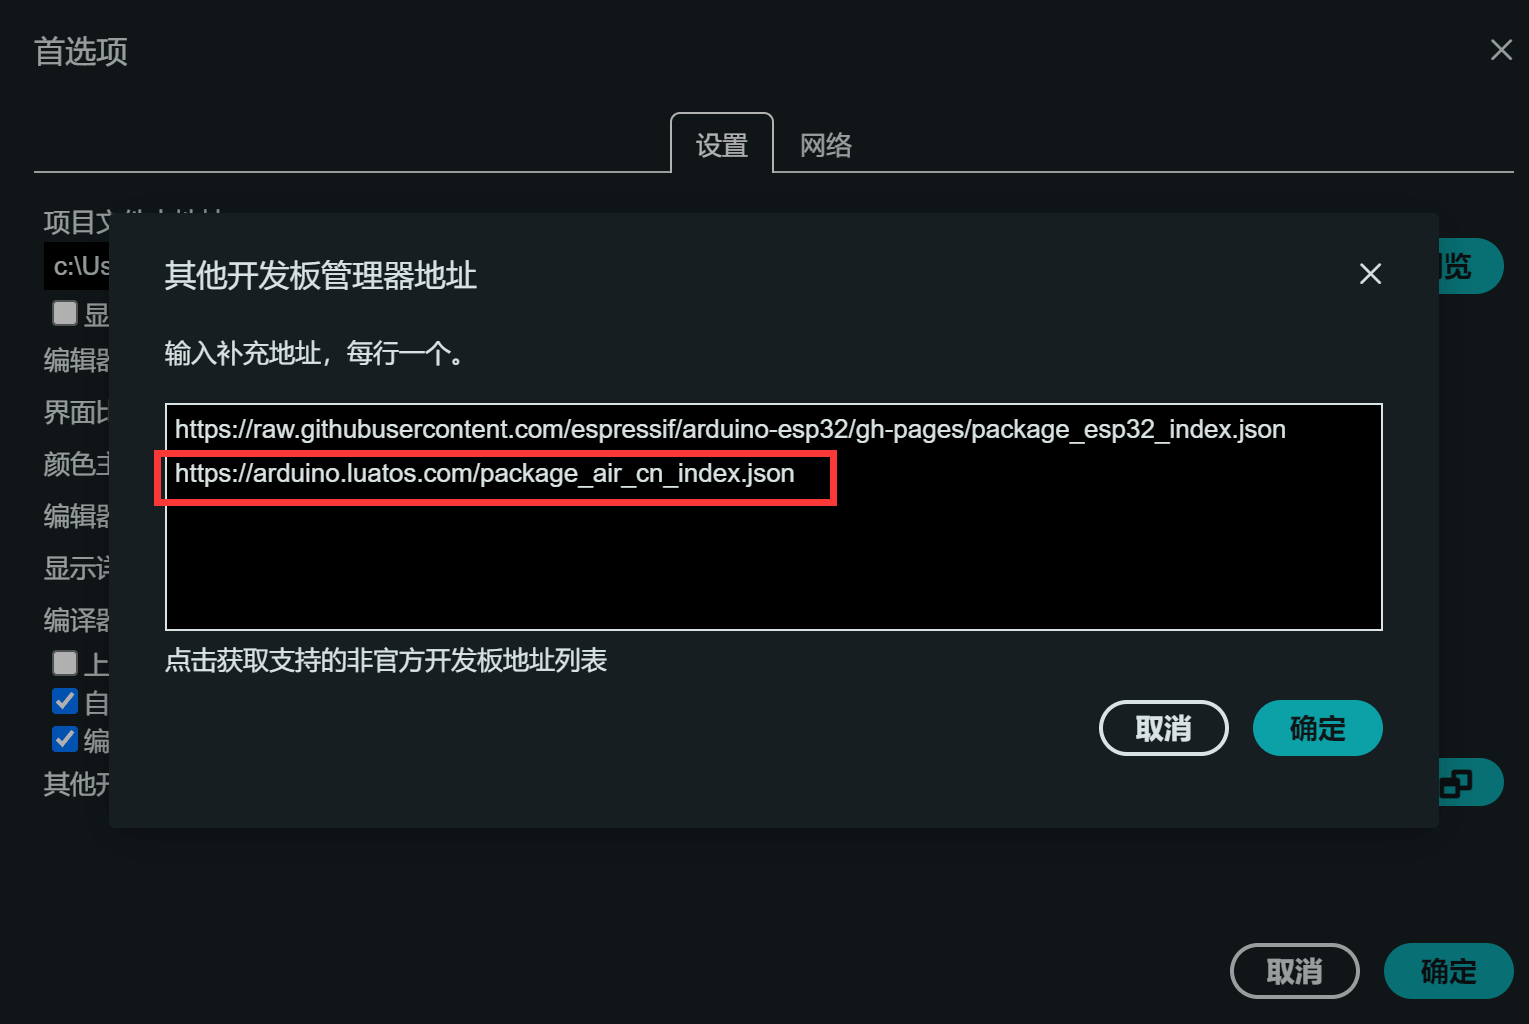
 Other Board Manager Address https://arduino.luatos.com/package_air_cn_index.json
(Use by overseas usershttps://github.com/Air-duino/Arduino-pack-json-ci/releases/download/Nightly/package_air_index.json)
Installing the Development Board#
Search in Development Board Manager``Air MCU
 Just install the latest version
Note
The installation process requires the installation of multiple tool chains, which may be slightly slower, please wait patiently
Choose a development board#
Note
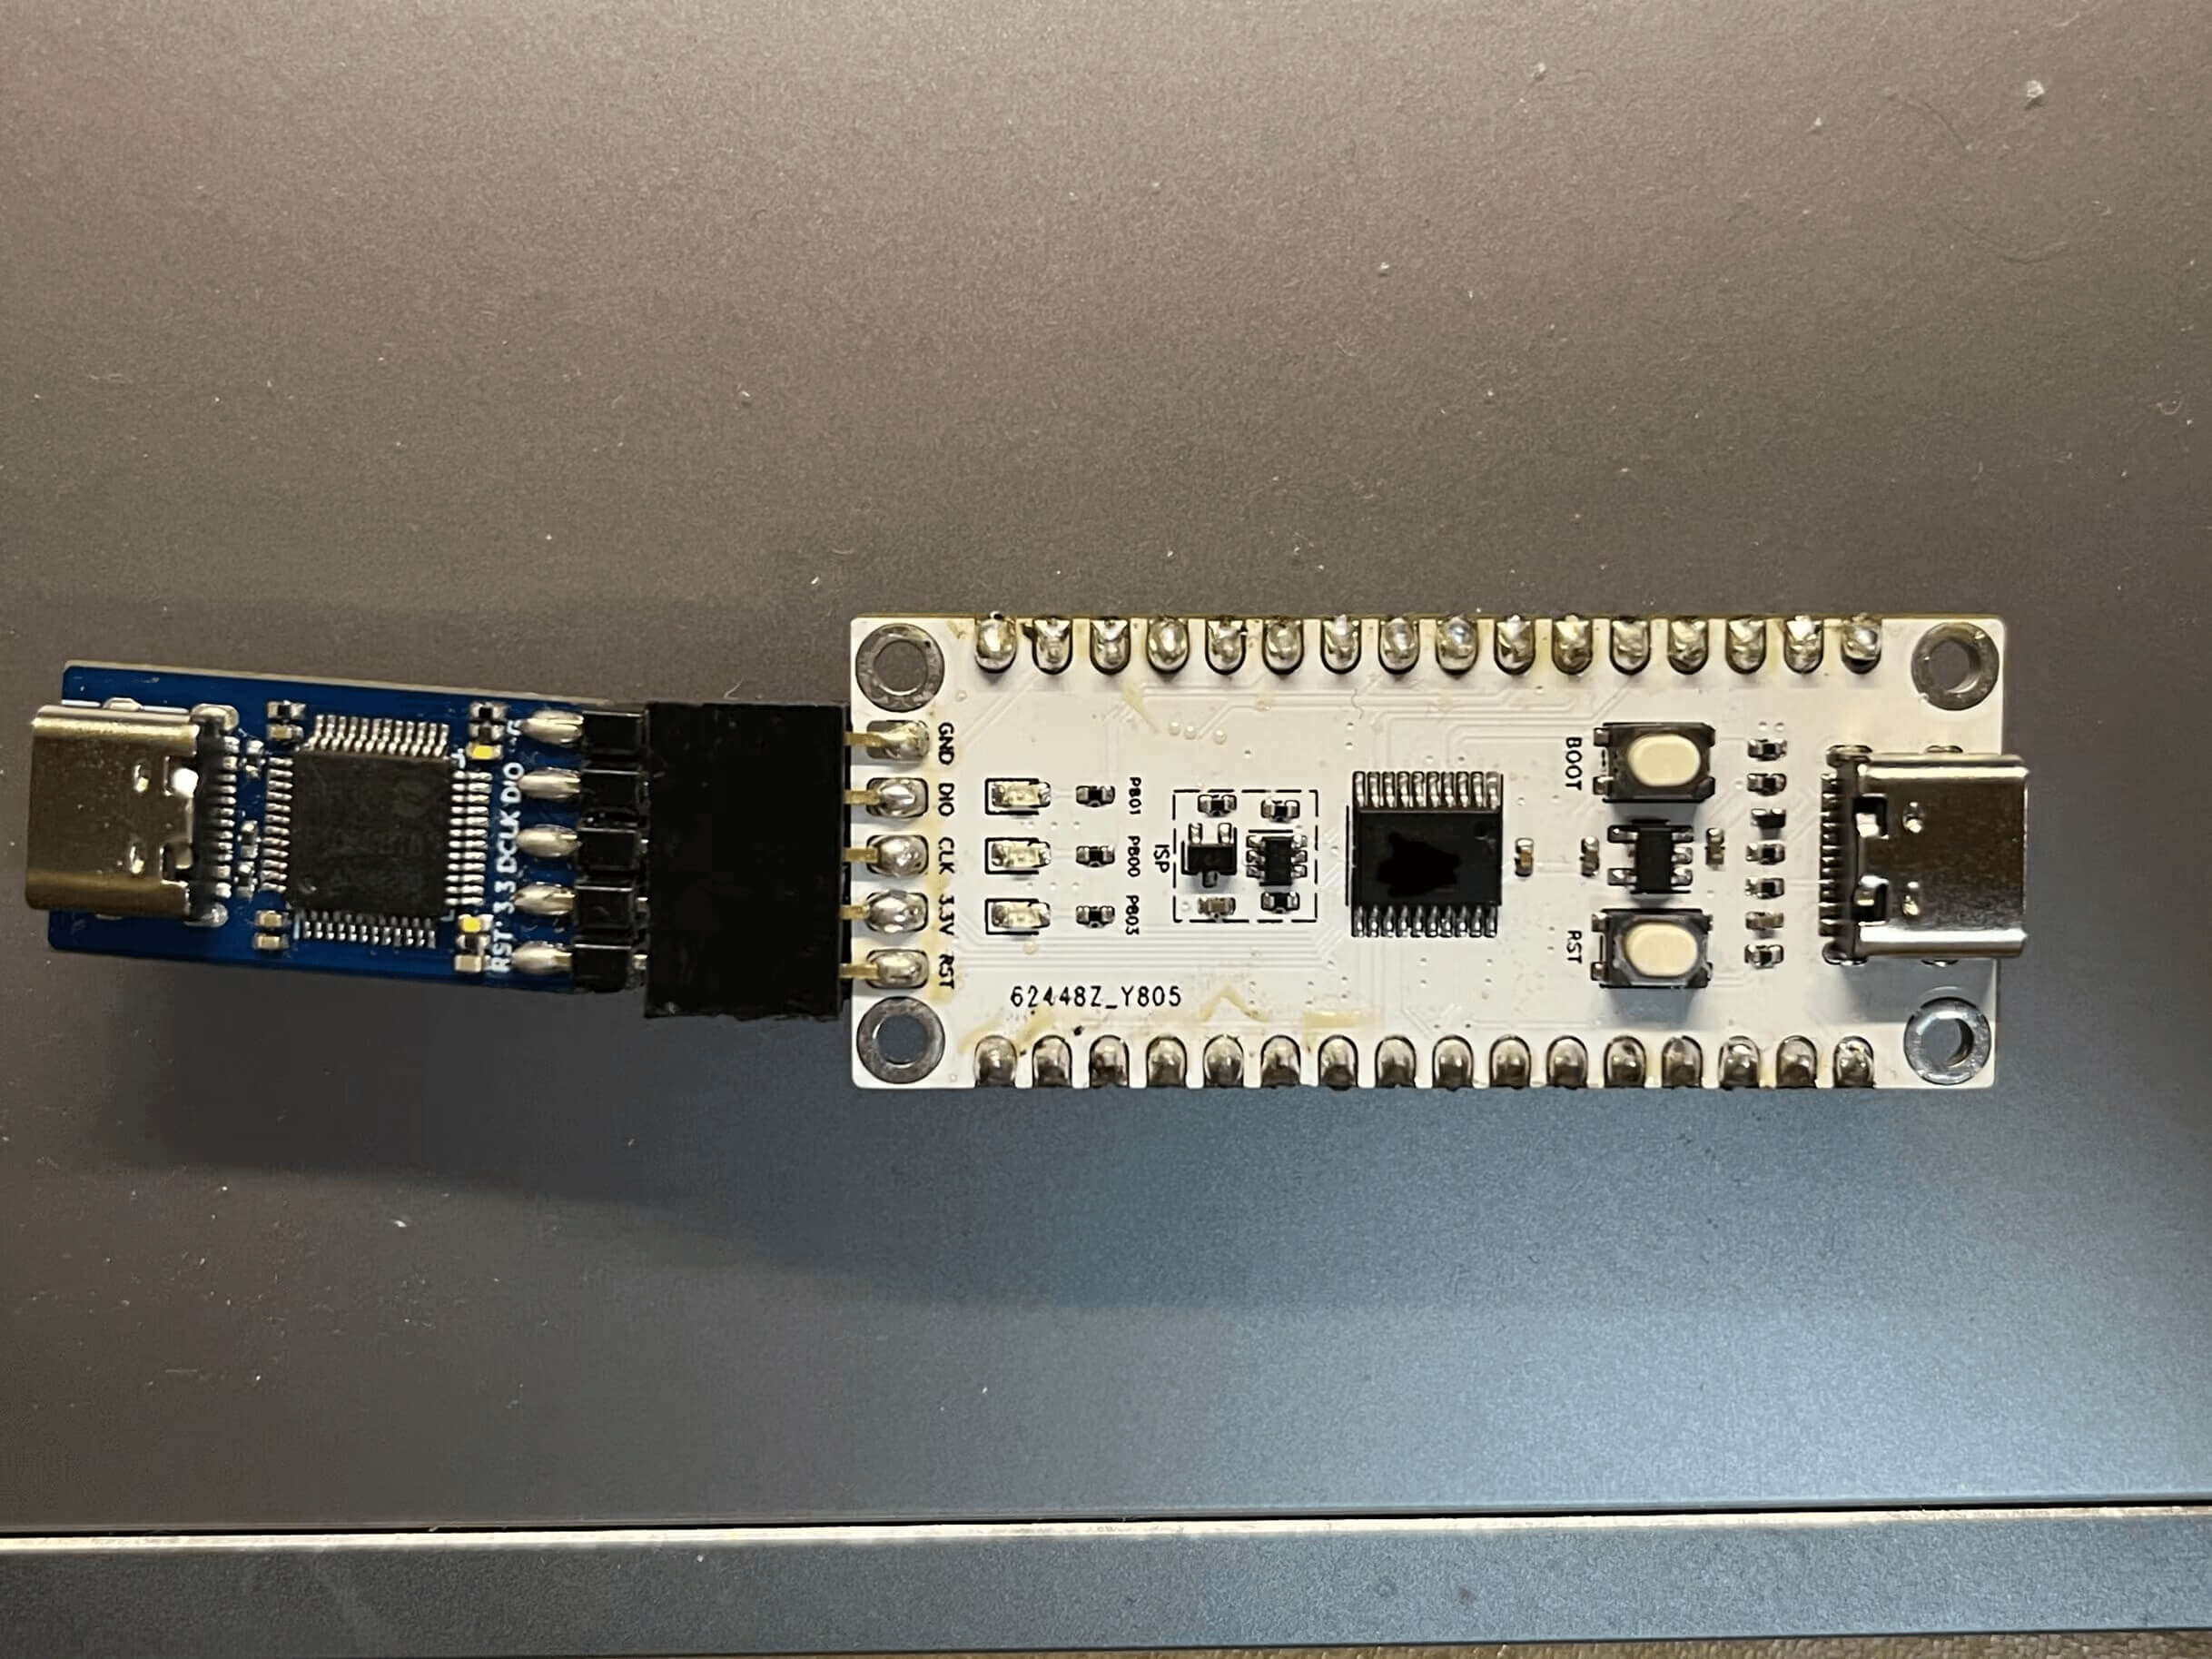
If it is a purchased whiteboard and a DAPLink debugger, it can be directly connected to the mother through the pin row, and the direction is shown in the figure.
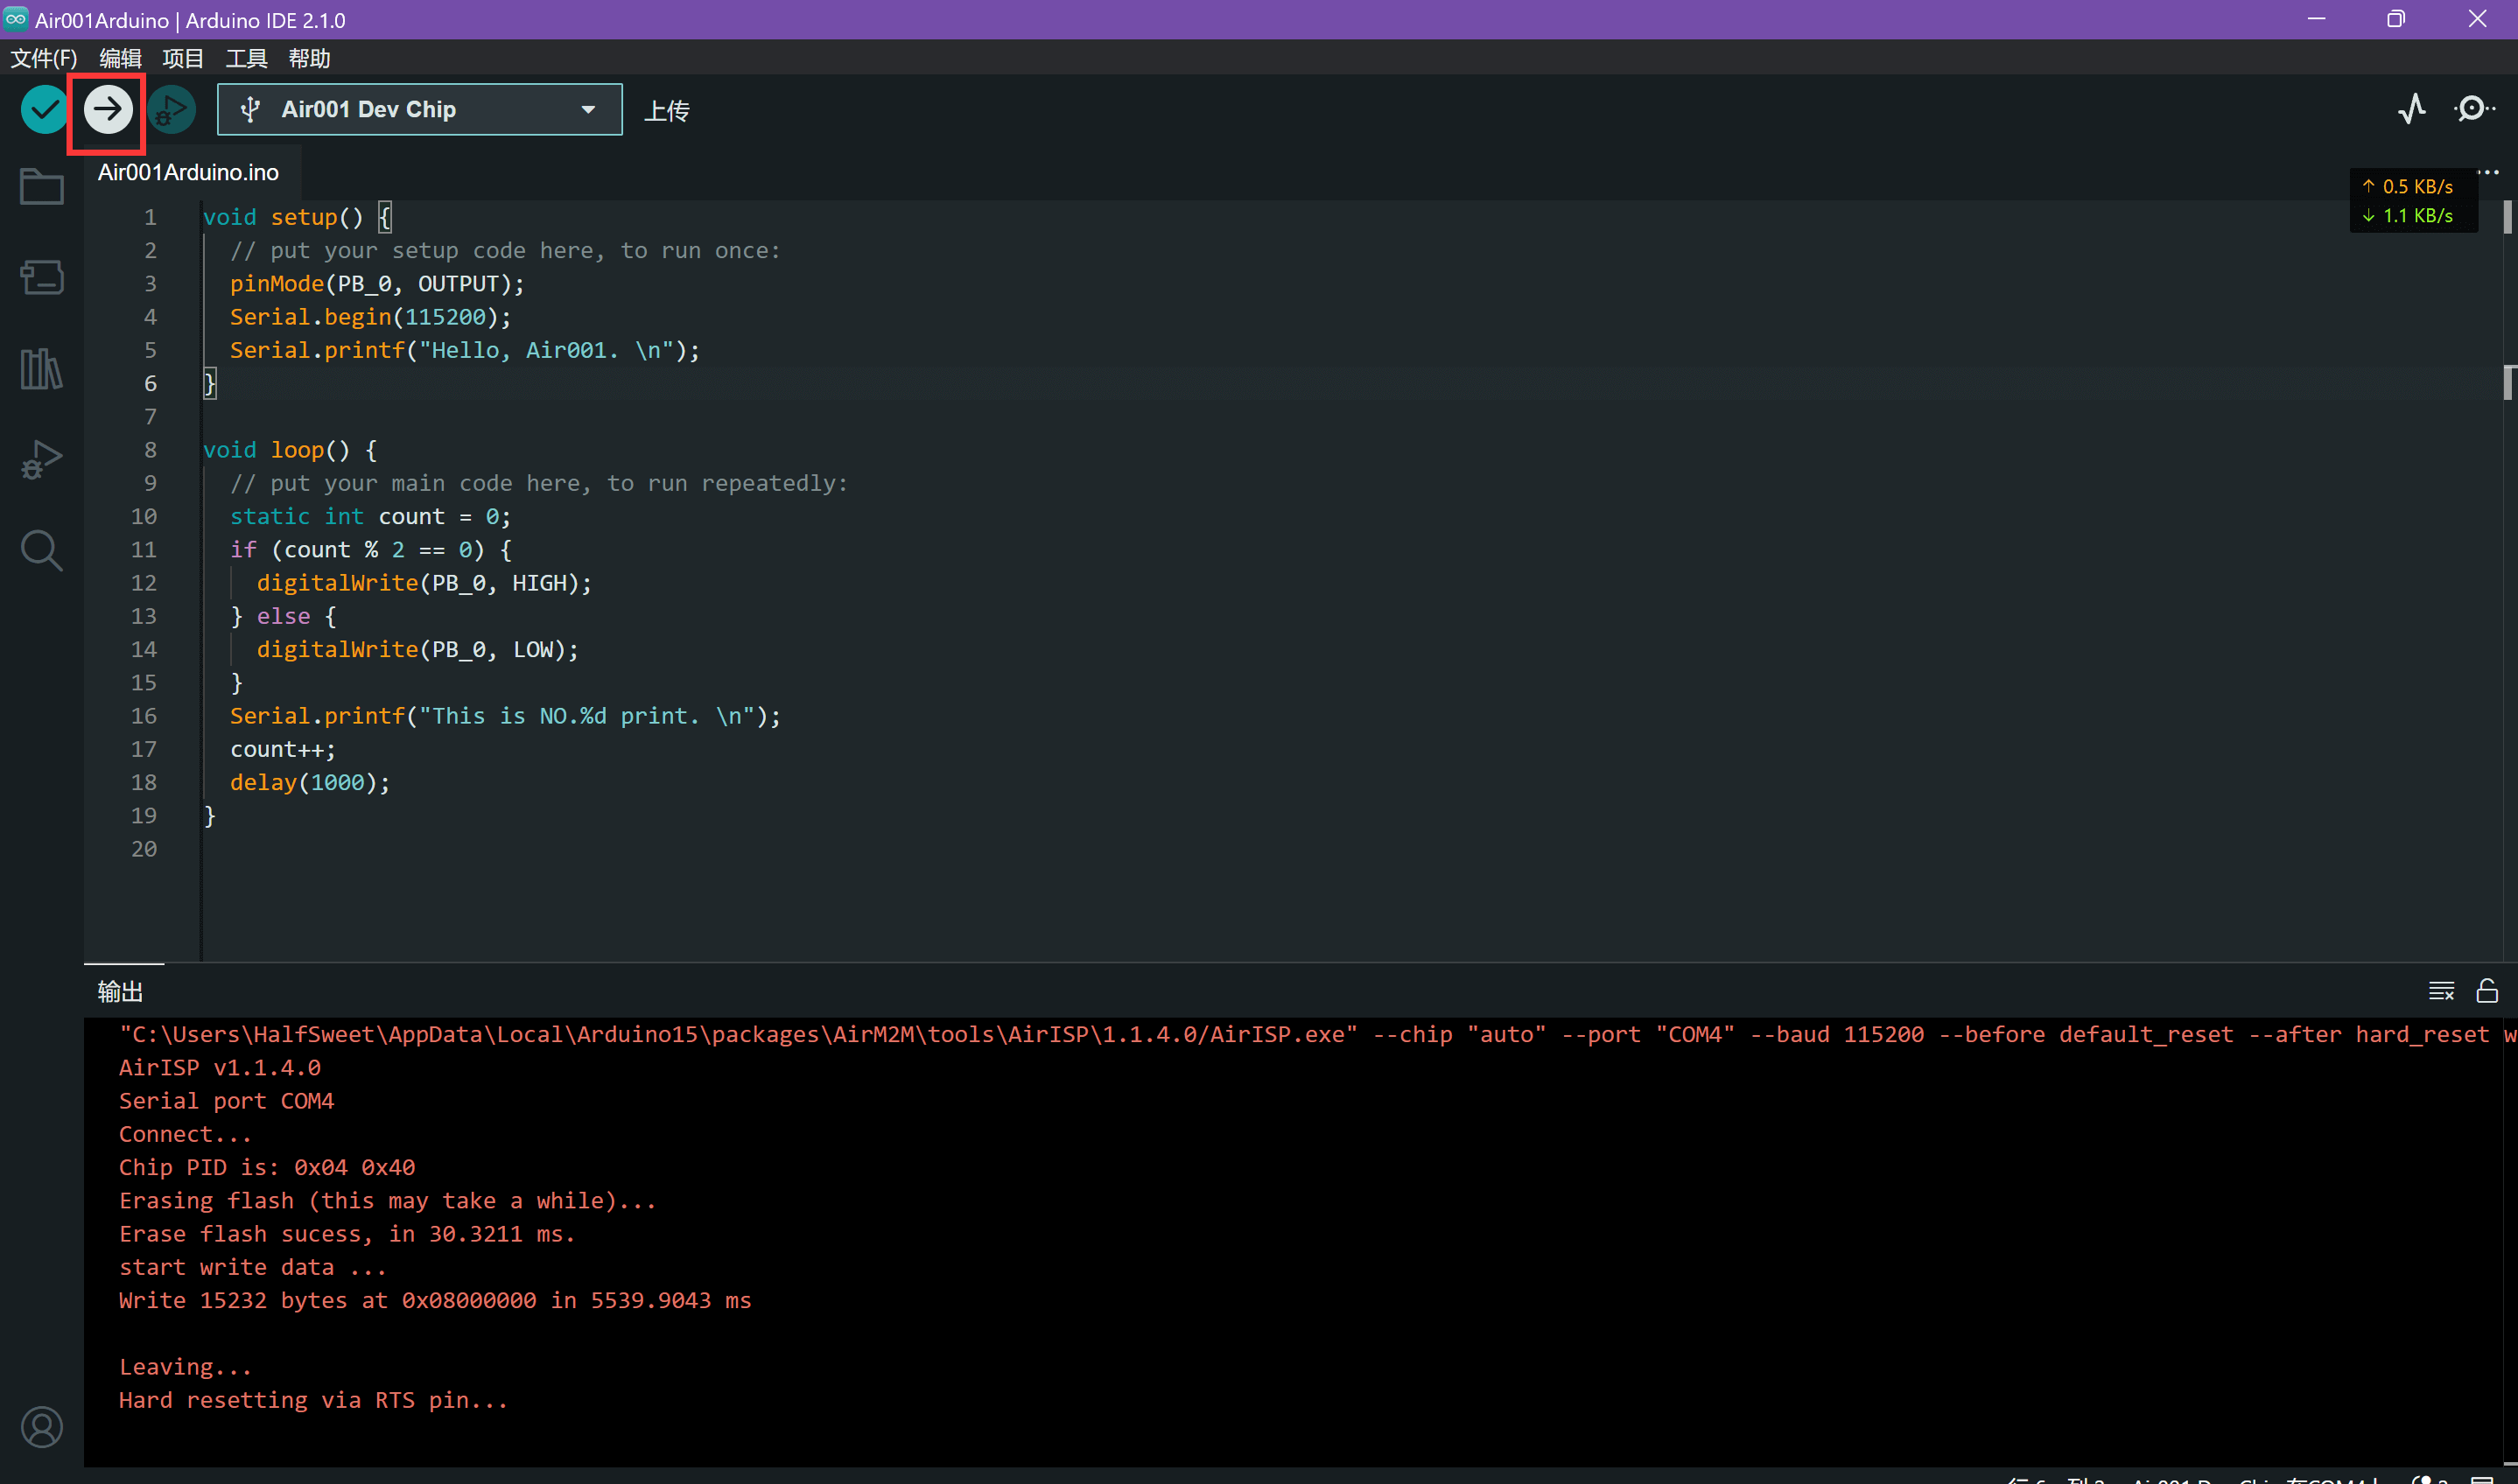
The development board selects the AirMCU-Air001 Board, and the port selects the connected serial port.
Add code#
Add some test code in the main function
void setup() {
  // put your setup code here, to run once:
  pinMode(PB_0, OUTPUT);
  Serial.begin(115200);
  Serial.printf("Hello, Air001. \n");
}

void loop() {
  // put your main code here, to run repeatedly:
  static int count = 0;
  if (count % 2 == 0) {
    digitalWrite(PB_0, HIGH);
  } else {
    digitalWrite(PB_0, LOW);
  }
  Serial.printf("This is NO.%d print. \n", count);
  count++;
  delay(1000);
}
Compile Download#
Refer to https://wiki.luatos.org/chips/air001/mcu.html#id4’s tutorial for wiring.
Click the Upload button and wait for the test code to be compiled and uploaded
View Serial Port Output#
If the code compilation and upload are normal, then open the serial port monitor and you can see the output related logs.
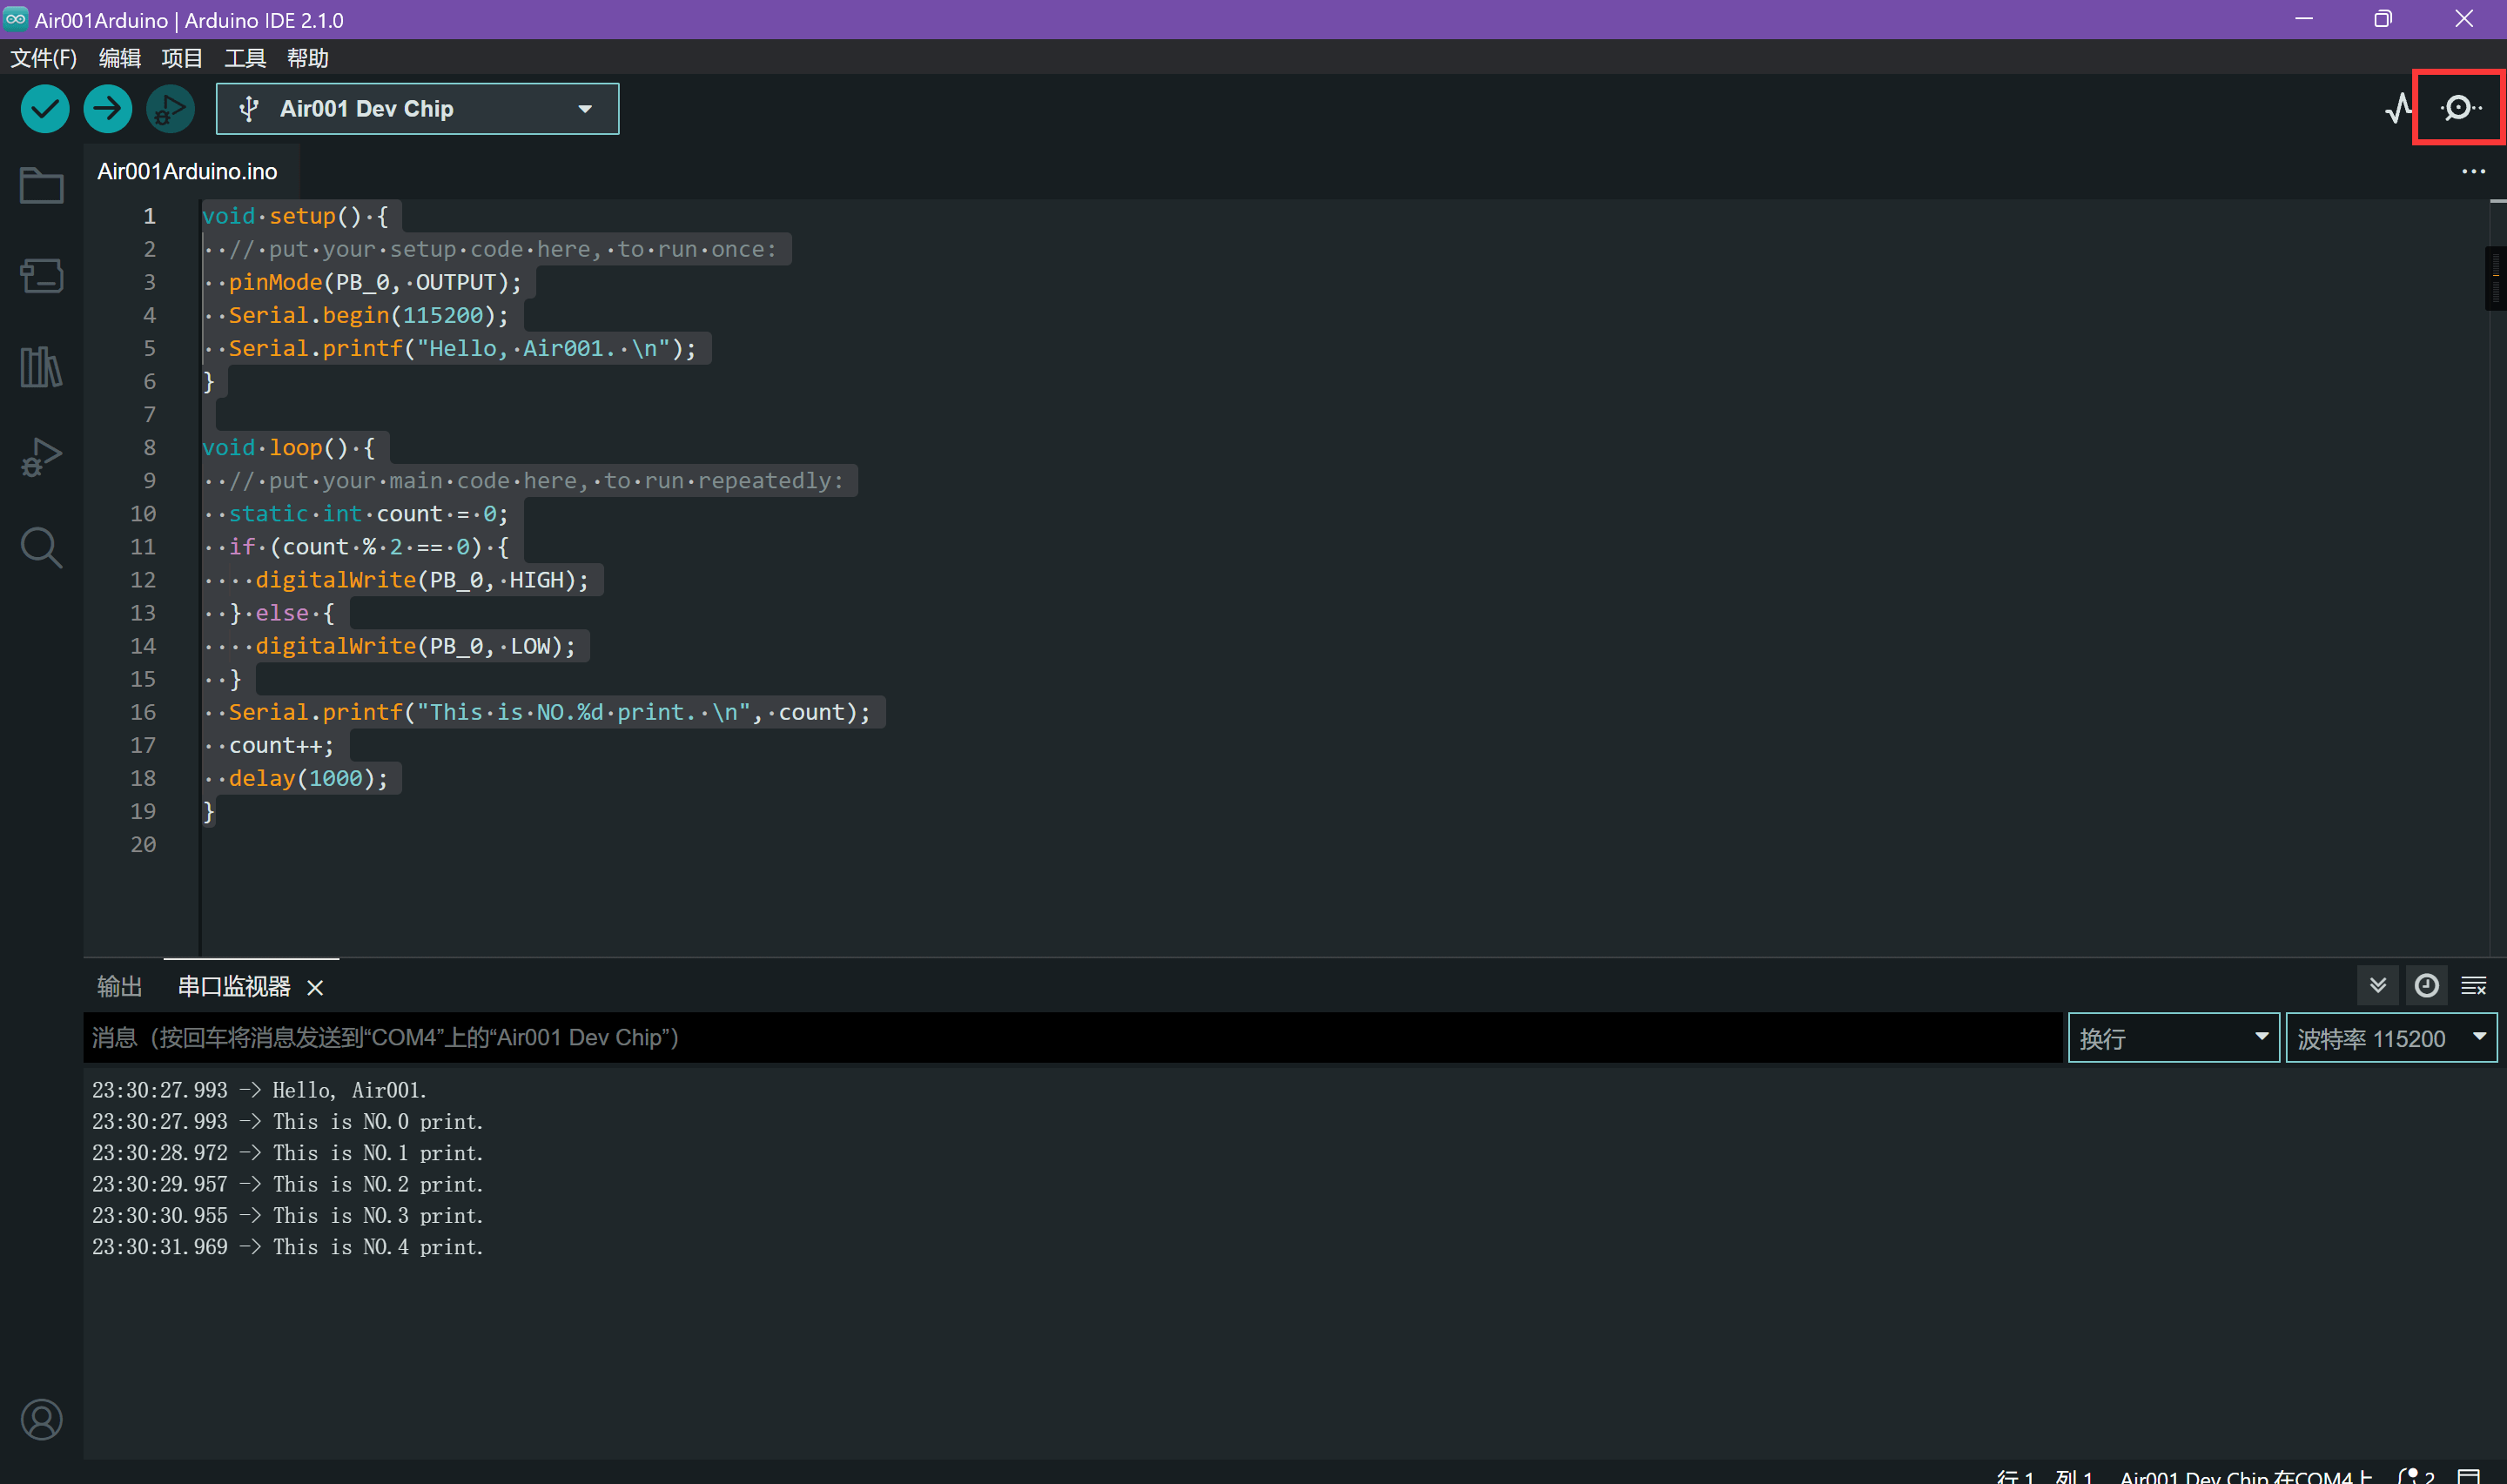 It can be observed that the LED flashes at an interval of 1 second.